So before I get started I wanted to remind you all to check out my giveaway going on right now. Make sure you enter, it is really a cute prize!
So I am home today with a sick Pork Chop. He was not feeling great last night, so it seems we have a Dr's visit in the works for today. So I figure that I might as well make the best of it. He can watch Disney and eat crackers, and I can type out a blog post. So you know, it could be worse. I do sort of feel bad that my friends at work have to wait until tomorrow to try this though, if they knew these were waiting for them. Well I don't think they would make it through the day.
 |
| I know right! Those are some huge marshmallows. |
So this past weekend I decided to try something new. I really wanted to start this blog to try and share new to me things. So I went right outside my comfort zone and made marshmallows. Then I got right back into my zone and covered them in chocolate. It was awesome!
So to start I did some googling and found out that there are two ways to make marshmallows. One way was with eggs, and one without. I opted for no eggs as I am cheap and did not want to buy eggs. The other reason is with no eggs it's one less way to screw it up.
So I found a recipe from Martha Stewart, and tweaked it a little bit with help and suggestions from the comments people made. The other really cool thing is you need a candy thermometer. Which I have, in the basement. Still in the package it came in, over 10 years ago. I know, I needed it when I was in culinary school and I was going to become a famous chef, and then it sat in the basement until now. I really get a lot of use out of my stuff, you know, eventually.
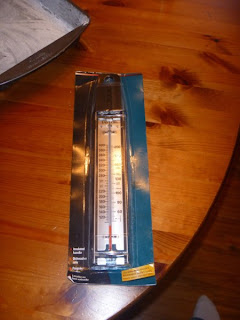 |
| Man if you could only see how dusty the package was, I hope I use it again before I forget about it again. |
So here you are, with like a million pictures, the easiest marshmallows ever! ( okay maybe not ever, but if I can do it, so can you.)
First get all your stuff together.
Marshmallows
Adapted from Martha Stewart
-2 1/2 TBSPs unflavoured gelatin ( this worked out to be 3 envelopes for me)
-1 cup water, split
-1 1/2 cup white sugar
-1 cup light corn syrup
-1/4 TSP salt
-1 TBSP vanilla bean paste (or vanilla extract)
-icing sugar for dusting
To start put your gelatin and 1/2 cup water in a mixing bowl and make sure it is combined and let it sit while you get the rest together.
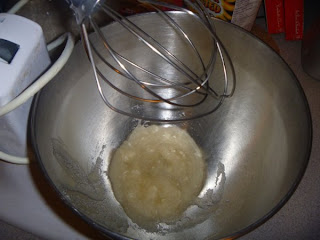 |
| I know it looks gross, but it will get better, I promise! |
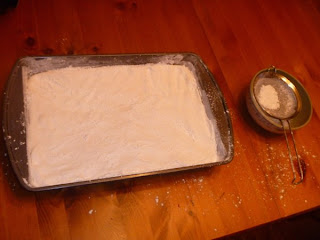
Then prepare your pan, a 9x13 cake pan, grease it with butter and sprinkle it with a lot of icing sugar.
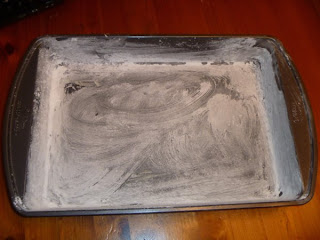 |
| I know, what post would be complete without a super cool picture like this. |
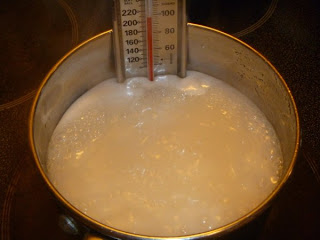
Combine the sugar, corn syrup, 1/2 cup water and salt in a sauce pan, and put over medium heat. Stir until the sugar dissolves.* Once it does, turn the heat up and attach your candy thermometer. Using a wet pastry brush, brush the sides of the pot to make sure there are no granules of undissolved sugar. Then turn the heat up and let it heat, unstirred until it reaches the hard ball stage. 244 degrees. I found that the first time the mixture started to boil, it looked like it was going to boil over. So I pulled it off the heat for a second then put it back on and watched it until it reached the hard ball stage.
* to make sure the sugar is dissolved, coat the spoon you are using to stir and run your finger along it. If it feels gritty the sugar is not dissolved, obviously if it is not gritty you are good to go.
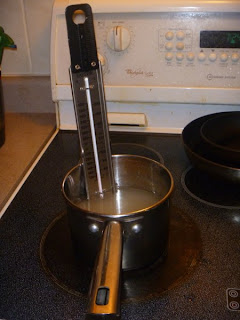 |
| I was so excited to finally use it, I know my life is sad. |
 |
| This is once it started to get hot. |
 |
| See starting to boil. |
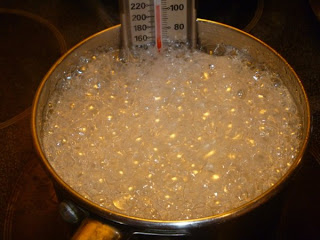 |
| And then it went to this in a few seconds and I screamed and put the camera down. But I just took it off the heat for a few seconds and we were fine. |
Once it reaches the correct temperature, turn your mixer on low, you should be using the whisk attachment. Then take your sugar mixture and slowly pour it into the gelatin mixture. Once it is all in turn up the mixer to high and beat it until the mixture turns light, white and fluffy and triples in volume. It took about 8 minutes.
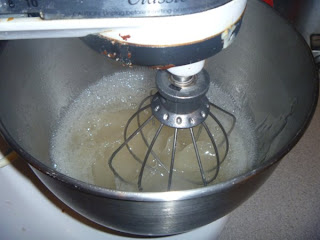 |
| So here it is, the sugar mix is all stirred in. |
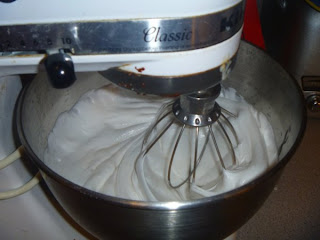 |
| Here it is I turned it up high and let it go. This is about 3 minutes in. |
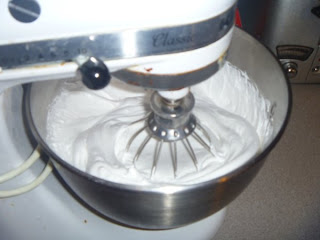 |
| And here it is just before I added the vanilla bean paste. |
The last step is to mix in the vanilla. Once it is all mixed in, you are ready to pour out the mixture.
 |
| You can see my hand prints, I found it easiest to sift the sugar on top. |
Pour it into your prepared pan and then sift a whole bunch of icing sugar on top. Then take your hands and push and pat the mixture down to even it out. If it starts to stick to your hands at all, just dust them in sugar.
Then you just leave it uncovered over night.
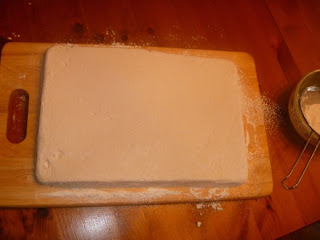
The next day, get a cutting board and cover it with icing sugar, then turn out your marshmallow onto it. If it sticks to the pan, pull it out at the corner and it will come out. If it is sticking to your hands at all, just dust your hands with icing sugar.
 |
| My set up. |
 |
| Right around here I started doing a little happy dance, I had made marshmallows!! I am queen of the culinary world! |
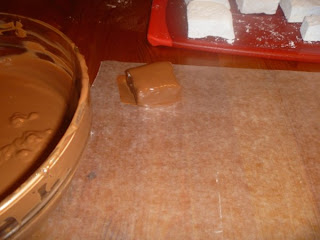
Then take a knife or pizza wheel and cut your marshmallows out. You could even use cookie cutters, but I did not want to waste any. Also I did not measure, which you can totally tell, but again, it worked out fine, some people will not want large pieces. Although I don't know who that could be, not me for sure.
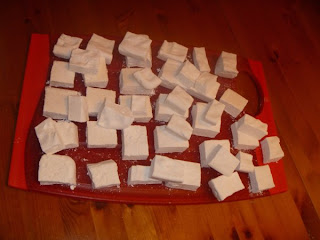 |
| Okay and now, I came back down to earth, as I realized I cannot cut even marshmallows. |
Once I finished cutting them all, I pulled them apart, and dusted the sticky edges in icing sugar and set them aside while I melted my candy melts.
I used chocolate candy melts and thinned them out a lot with paraffin crystals. When I was ready I used two forks to dip each marshmallow, they float so you have to sort of spoon the chocolate over it.
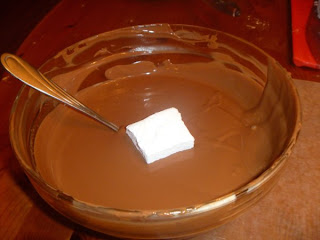 |
| Oh man! |
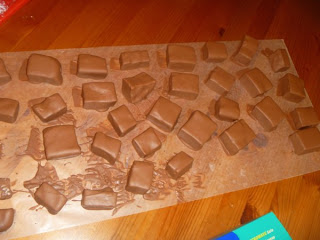
Then I left them out to dry.
 |
| At this point I just wanted to eat it, but you know, melted chocolate would have been messy. Sigh. |
 |
| All done, and I did try to eat one, but it stuck to my paper because it was not totally dry yet. But is still tasted great. |
And they turned out great! I love how the vanilla bean paste adds to the marshmallow and the chocolate is a nice thin layer of yumminess. And I am also really surprised with how easy they were, other than the icing sugar ending up everywhere.
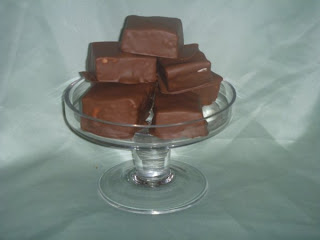 |
| And I tried to not get too upset about the few white patches. The icing sugar made it hard for the chocolate to stick, so if a bubble popped there would be a white part. Oh well, it looks more home made this way right? |
So back to watching Disney with Pork Chop and getting some cuddles in. Hey you have to grab them when they offer them. Wonder if I will be able to make him take a nap, one can hope.


26 comments:
looks yummy!!!
Looks so yummy!! My mouth is watering! :)
enjoy the cuddles! These look delicious! Hope he feels better.
Oh my, yum! :) DD brought a cake balls cookbook home from the library and we're going to try our hand at them this weekend.
Man oh man, these look SO good! I can almost taste them!
Love Penny Scrap-aholic@blogspot.com
i swear every winter that i'm going to try this. you may have just given me the push i need to finally DO IT!
plus, i too wish to be Queen of the Culinary World.
hehehe
Thanks, they are super yummy!
Susan, I managed to get a few cuddles in, but he got medicine from the Dr so he was feeling better, darn it!
OH Lisa I hope they work out, they are so fun and good too!
Shannon, I think if you do make them you are totally allowed to call yourself the queen, just cut them better than me, or you get demoted.
These look great - I've always wanted to try making marshmallows!
These are beautiful! Chocolate covered marshmallows were my grandmother's favorite treat in all the world!
Making marshmallows is on my must do list. Covering them with chocolate is an even better idea!
Homemade marshmallows are something I want to try and make someday.
Awesome! Thanks for this useful post dear...
I don't think I knew there was a recipe with no eggs. Those are the ones I'd go for.
And I love that--you'd go out of your comfort zone and make mallows and then go back into your zone and cover them in chocolate!
This looks really yummy! Thanks for sharing.
~Mrs. Delightful
ourdelightfulhome.blogspot.com
These look awesome..I keep meaning to make homemade marshmallows and now you went and did all the work... so I will probably just use the recipe you did :) Thanks :)
I've been wanting to mkae homemade marshamllows for awhile but covered in chocolate???!!! Oh yeah! I'm totally going to do it now!
Those look really good!
I don't have a stand mixer, I'd have do it with a hand held one. I've tried to find a candy thermometer in Michaels and JoAnn's but they didn't have one. How can they sell candy making supplies and not a thermometer? But I was glad to see the other day they got metal candy dipping tools in! Last time I looked all they had was cheap plastic ones. Maybe I will buy them today with my 40% off coupon.
I've only made marshmallows once and they were really good but I didn't think to dip them in chocolate! I hope you stop back and add this to my What's In The Gunny Sack link party!
These look fantastic! I have been wanting to try homemade marshmallows for a long time now and I have been too scared I would screw something up. These look easy enough that I could try, thanks!
Hope you don't mind I will be pinning this also. :)
I need to try making my own marshmallows one of these days! And I'm all about coating things in chocolate... :)
ps - have you ever tried CandiQuik candy coatings?
Omg...This recipe looks to dye for! I'm having a linky party again, and would love for you to join it! Here is the link http://www.thesouthernproductqueen.com/one-stop-s... Thanks for sharing!
These look amazing. I am pinning them and hope to make them in the future!
These look fantastic!
Those look divine! Thanks so much for linking up!! Just a reminder to register for my giveaway...
Ramsign Giveaway: Porcelain Enamel Sign {up to $99 value}
XO, Aimee
What an EXCELLENT tutorial, it sure makes me want to try these!! I think these would be fun to give at Valentines day if you piped a little heart on each one.
You make all that look so easy! I should give this a try, I bet my daughter would get a kick out of making homemade marshmallows
Post a Comment